.svg)
.svg)

If you’re building a drum track in Ableton Live, try reaching for a production-ready Drum Rack. What do I mean by “production-ready”? In the heat of the moment, when I’m feeling inspired and the ideas are flowing, I need tools that are ready to use right then and there–I don’t want to have to build them from scratch. I need tools that help me make decisions quickly by having them made ahead of time. And I need tools that won’t slow down any other part of the production process. A production-ready Drum Rack has all of my samples ready to go, macro knobs mapped to the parameters I use the most, and is easy on my computer’s hard disk.
In this tutorial, I’ll build a Drum Rack from the ground up, something I’d be able to use for future tracks.
Step 1: Create a Custom Slicing Preset
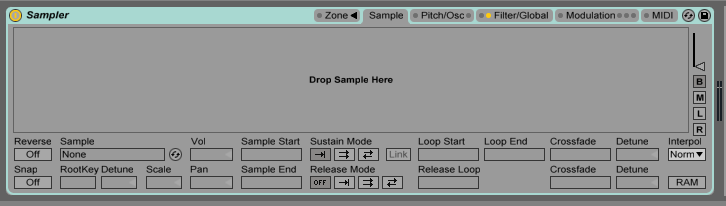
Add an instance of Sampler to a MIDI track. That’s all you’re going to need, you don’t need to add any effects, etc. Drag and drop the Sampler to User Library > Default > Slicing. Be sure to check out my previous article on creating more elaborate slicing presets. You’ll see why we made this preset in the next step.
Step 2: Set Up Your Samples

This part is going to sound strange, but just go with it because this is all part of the set up–we’re not writing music here. Set the global clock to 60BPM. Then, go to the Arrangement View and set the grid to a Fixed Grid at 1 Bar.
Next, drag all of your favorite samples, of a particular type, and drop them on the Arrangement View. By setting the clock to 60BPM and fixing the grid to 1 Bar, the samples all start on the first beat of a bar.
Once the samples are in the Arrangement View, select and right-click them. Select the option to Consolidate the many audio files into a single audio file. This is what will allow you to use 100s and 100s of samples in one Drum Rack without killing your hard disk.
Finally, drag the newly consolidated audio clip to the Session View, right-click on it and select Slice to New MIDI Track. Here’s where Step 1 comes in handy: for “Create one slice per” choose Bar, and for “Slicing Preset” choose the simple Sampler preset that you made. A new MIDI track will be created that houses an instance of Sampler which holds a single audio file sliced at the beginning of each sample.
Step 3: Set Up Your Instrument
Now that the samples are all in one place – in one audio file sliced up in Sampler – it’s time to set up a Drum Rack so we can use these samples. Remember, this is all pre-production so be patient.
Right-click on Sampler’s device title bar and select Group to place it in to an Instrument Rack. Then right-click on the rack itself and select Group to Drum Rack. This will place the instrument rack on a chain (C1) in a new Drum Rack.
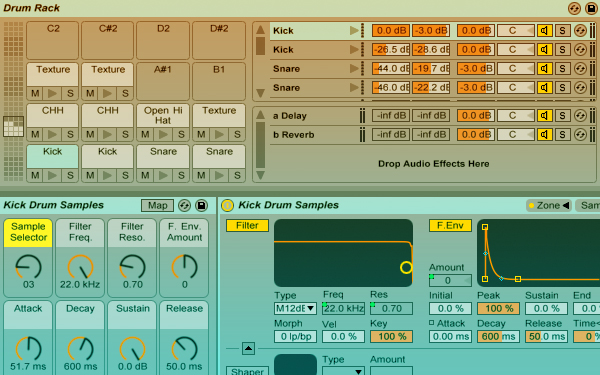
Within Sampler, open the Zone tab and you’ll see all of the slices you made, one for each sample. This will take some trial and error, but place all of the key zones and their Root Notes (R) to C3. This makes it so Drum Rack can actually play the samples right away and at their original pitches.
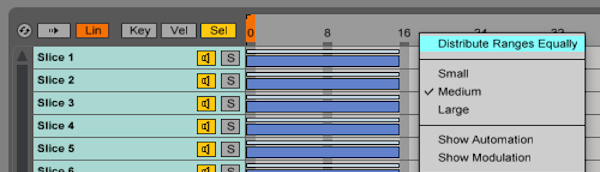
Go to Sampler’s Sample Select Editor (Sel). We’re going to set it up so we can use a single macro knob to scroll through all of the samples. In the Splice file, I have 16 kick drums, so I’m looking for a range of 0 to 15 in the editor. Set all of the samples’ ranges to 0 to 15, right-click on the Sample Select Ruler, and select Distribute Ranges Equally.
Step 4: Map and Test the Drum Rack
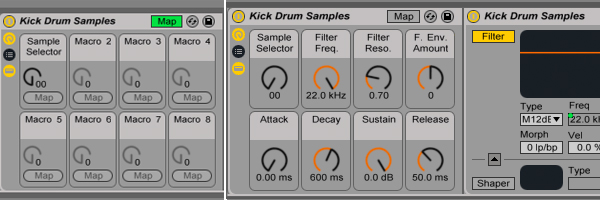
We placed the Sampler in an Instrument Rack so we can take advantage of mapping some parameters to macro knobs. Back in Sampler’s Sample Select Editor, right-click on the Sample Select Ruler and select Map to Macro 1.
Next, click on the Macro Map Mode Switch (Map) of the Instrument Rack so you can edit the mapping. The Live Browser will then change to the Mapping Browser. The Min value of the Sample Select should stay at 00. However, the Max value need to change according to the number of samples you have. I used 16 kick drum samples, so my Max would be 15. If you had 100 samples, the range is 0 to 99. Exit Macro Map Mode–it’s time to test the Drum Rack.
Create a new MIDI clip and draw in some notes. Press play and you should hear the first sample that you dropped in. Turn the Sample Selector macro and you’ll hear the the other kick drum samples. Mission complete, but feel free to map some other parameters to the remaining seven macro knobs. I like to map the ADSR controls of the volume envelope and some Filter parameters.
Step 5: Repeat the Process for Other Sounds and SAVE
You’ve completed all of the steps for one bank of samples, kick drums in my example. Now go through the process again for your other samples. HOWEVER, drag the new Instrument Racks onto a new pad/chain of the Drum Rack that you’ve already made. Something to keep in mind i that you still have the 8 macro knobs of the Drum Rack that are free–use them for some top-level editing and sound design. Remember to SAVE your new Drum Rack by clicking on the disk icon in the top-right corner.
Maybe you’ve seen this technique before, but the steps I’ve laid out above will give you an instrument that’s much easier on your hard disk. In the Splice file, I really only have 5 audio files–if you don’t believe me, check the project files. That’s faster to load than 500-600 samples that might crash Live when called upon all at once. Again, this is all so I can get my ideas out as quickly as possible.
Good luck building your own production-ready Drum Racks.
Explore royalty-free sounds from leading artists, producers, and sound designers:
August 21, 2014


